November 19, 2013

Black Forest Cake


I never expected the amount of excitement that would come around getting a new camera. Before its arrival, I spent countless hours watching videos and reading tutorials to prepare myself to step into the wonderful world of DSLR photography. Additionally, I signed up for a food photography e-course by Minimalist Baker and can say that it has been an extremely helpful asset towards exploring the new possibilities brought up by the camera. Prior to that, I used a point-and-shoot camera, which served me well for a few years as a beginner, until I began to recognise its limitations in both image quality and shooting speed. After finally completing school, I gathered the money I saved up for the past few years to invest in a good camera, forming an admiration for the Canon 100D as the smallest and lightest DLSR camera on the market; perfect for my small hands. The camera exceeded my expectations and hopes for beautiful photography, so much so, that I baked my own version of a Black Forest Cake to welcome it as the first of many posts to feature pictures taken with my camera.


The cake itself is adapted from Sweetapolita's one-bowl chocolate cake recipe, wherein it beholds a moist, dark chocolate crumb that is easy to bake as it is to eat. Although the intensity of the chocolate depends on the cocoa powder, it is a great cake to whip up for those sudden chocolate cravings. It is also one of those cakes that stays moist in the fridge for days (if it even lasts that long!), so it is perfectly fine to bake and freeze the cake layers ahead before frosting and decorating. And the frosting, is non other than swiss meringue buttercream flavoured with dark chocolate. Luckily I had planned ahead, using the egg yolks for salted caramel ice cream, which was unfortunately out of the running to be photographed. While the buttercream turned out with a lighter chocolate colour and intensity, it was heavenly silky, smooth and melted in the mouth as if it was made out of chocolate clouds. It's amazing how swiss meringue buttercream can be so delicious without being all gritty and unpleasant like the sugary powdered-sugar frosting.  


Inside the cake is layers of vanilla whipped cream filling with fresh cherries, adding a juicy burst of cherry goodness in every bite. Light, airy, whipped cream accentuating subtle sweetness is a traditional component, yet the combination of it with chocolate swiss meringue buttercream adds a modern take on the classic Black Forest cake. The chocolate trees I had piped for the collar is somewhat borderline between messy and elegant. I mean, it's pretty inconsistent regarding the design and size of each tree. But it does kind of cover up my impatience on getting a perfectly smooth and even surface. Plus I was running out of time to take advantage of the beautiful sunlight streaming through the window. In the end, the piping was messy as the buttercream had become soft by the time I had frosted the cake, but the cake overall tasted pretty good. Also, I noticed that the frosting on the outside of the cake was too thin and needed more frosting to cover up. Other than that, I'm pretty happy with it, and hopefully you may want to give this cake a try; its worth the extra time and effort!


One-bowl chocolate cake
Makes one 6-inch, 3 layer cake 
Adapted from Sweetapolita

Ingredients:
  • 1 and 1/2 cups of plain (all-purpose) flour (180 g)
  • 1 cup of sugar (225 g)
  • 1/2 cup of cocoa powder (60 g)
  • 1 and 1/4 teaspoons of baking powder (6 g)
  • 1 and 1/4 teaspoons of baking soda (6 g)
  • 1/2 teaspoon of salt (2.5 g)
  • 140 ml of milk
  • 130 ml of strong, hot brewed coffee OR boiled water
  • 75 ml of vegetable oil
  • 2 eggs, room temperature 
  • 1 tablespoon of vanilla extract (15 ml)

Method:
  1. Preheat the oven to 180 degrees C (350 degrees F). Grease three 6-inch round cake tins with melted butter, placing baking paper rounds on the base of each tin.
  2. Sift all the dry ingredients in the bowl of an electric mixer.
  3. Briefly whisk together all the remaining wet ingredients in a jug for easy pouring.
  4. Using the paddle attachment on the mixer, mix the dry ingredients on medium speed for 2 minutes.
  5. Slowly pour the liquid from the jug prepared earlier into the mixture and mix until combined. If there are any lumps, continue mixing until the batter is smooth. 
  6. Evenly divide the mixture between the three pans using an electronic scale, and bake in the preheated oven for 20 minutes. 
  7. Rotate the pans in the oven, and continue baking for about another ten minutes. The cakes are ready when a toothpick inserted in the center comes out with a few crumbs.
  8. Cool the cake layers on a wired rack for 15 minutes, turning them out to completely cool. If the cakes are domed, you may try to use a clean tea towel to gently push down on the dome to flatten it immediately after they have come out of the oven.

Chocolate Swiss Meringue Buttercream


Ingredients:
  • 5 large, fresh egg whites (150 g)
  • 1 cup of sugar (225 g) with two teaspoons taken out
  • 200 g of unsalted butter, at room temperature and cut into cubes
  • 1 teaspoon of vanilla extract (5 ml)
  • 200 g of chopped dark chocolate (300 g if you want a more intense chocolate flavour)
Method:
  1. Melt the chocolate in a heatproof bowl over a pot of simmering water, or in a microwave, stirring at 20 second intervals until smooth. Set aside to cool.
  2. In a heatproof bowl set over a pot of simmering water, whisk the egg whites and sugar together until the temperature reaches 65.5 degrees C (150 degrees F) or until the sugar has dissolved completely and the egg whites are hot to touch.
  3. Transfer the egg whites to the bowl of an electric mixer. Using the whisk attachment of the mixer, whisk the mixture at high speed to firm peaks until the meringue is thick, glossy and the bottom of the bowl feels neutral (not warm).
  4. At medium speed, add the butter cubes one at a time, until incorporated. Mix until it reaches a silky smooth texture. If the mixture has curdled, continue mixing until it becomes smooth again. If the mixture is runny, refrigerate it for about 15 minutes and continue mixing until it comes back together.
  5. Add vanilla, and then add the melted and cooled chocolate at medium speed until combined.

For the vanilla whipped cream filling, whisk 420 ml of cold thickened cream, 1/4 cup of powdered (icing) sugar and 2 teaspoons of vanilla extract with an electric mixer to firm peaks (it should hold its shape) until combined. 

For the chocolate trees, melt 200 g of dark/milk chocolate and fill it into a piping bag with a small, round tip. Pipe trees of about 3 inches tall on a baking tray lined with baking (parchment) paper. Extra chocolate may be melted again and reused for other purposes.

Assembly of Black Forest Cake


  1. Using a cake turntable, place a cake layer on a circular cake board. With an ice cream scoop, add one scoop of whipped cream filling onto the cake and evenly spread it out with an offset palette knife. Spread a few pitted fresh cherries on top and add another scoop of cream on top of the cherries, smoothing it out. 
  2. Repeat the step for another layer, placing a cake layer on top of the cream and adding the cherries.
  3. Fill the spaces in between the cake layers with more whipped cream.
  4. Refrigerate the cake for about 15 minutes.
  5. Add a scoop of chocolate swiss meringue buttercream on top of the cake, smoothing out and applying to the sides of the cake until thinly covered to seal in the crumbs. Refrigerate for at least 30 minutes.
  6. Add more buttercream to the sides of the cake to form a somewhat thick layer, using an offset palette knife and bench scraper to achieve a smooth surface.
  7. Pipe a buttercream border using a 1M star tip.
  8. Chill the cake to set for at least 2 hours.
  9. When ready to serve, carefully peel the chocolate trees from the baking paper and place them on the sides of the cake.
  10. Serve the cake at room temperature, carefully slicing the cake in between each chocolate tree.


November 10, 2013

Double Chocolate Cake Pops


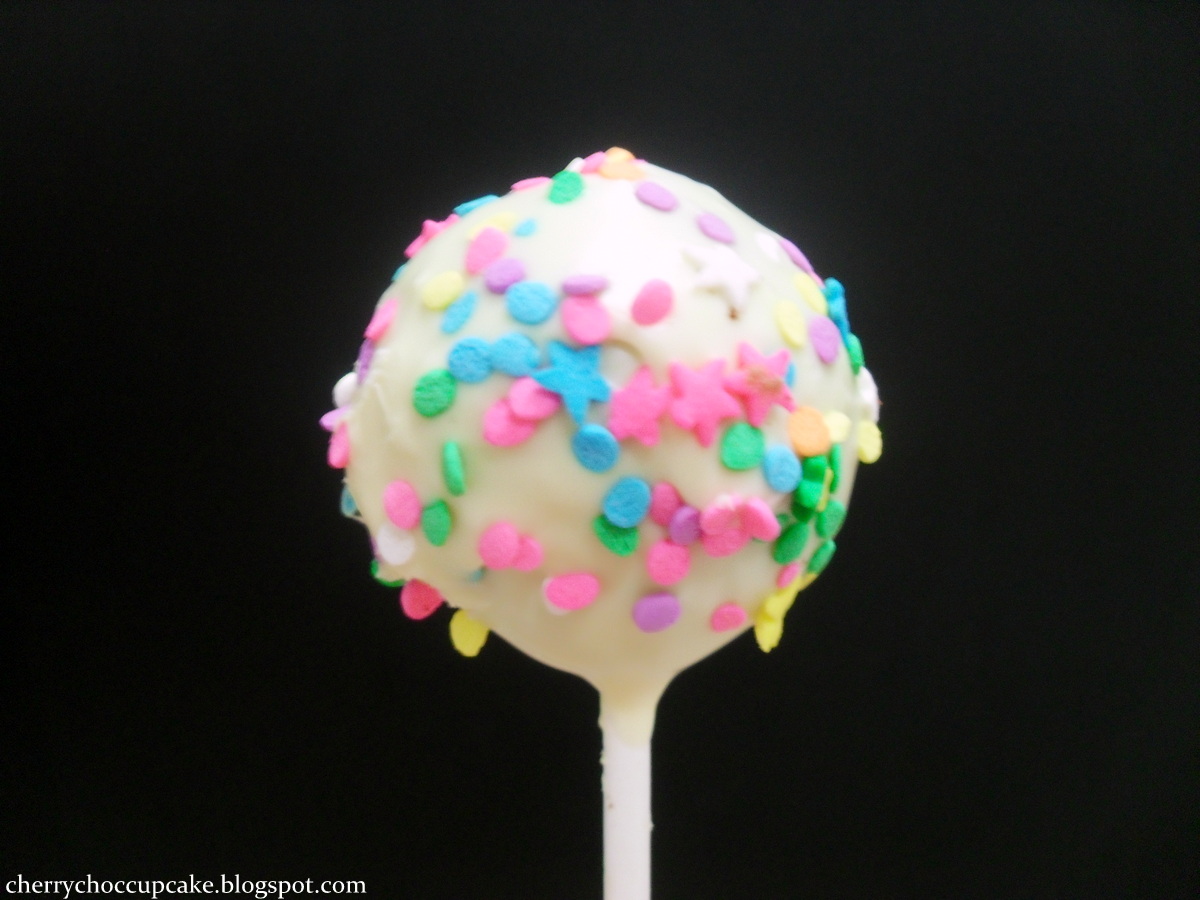
I made these cake pops in the past weekend for a party, wrapped in cellophane bags with a cute ribbon entitled "EAT ME". I still can't get my head around why I didn't make these treats earlier. But all the steps involved did make it seem a little tricky and fiddly to create; the rolling of the cake balls, inserting the lollipop sticks, freezing them, dipping them in chocolate and finally decorating them with sprinkles. Even with the amount of work to make them, they are worth the effort and seem to be simple and easy to make. For my first try, I think it was a success.


These cake pops were demolished by the kids, I mean everyone thought white chocolate and nutella chocolate cake go hand in hand. Funnily, one of the kids called it as one of those massive chupa-chups "lollipop" before I told her it was basically a cake ball on a stick. Brilliant idea to whoever came up with cake pops.


It was pretty frustrating when some of the cake pops fell apart or refused to be held by a lollipop stick, even after spending some time in the freezer. I was able to save the best ones by re-shaping them into balls and forcing the sticks to hold them in place. I also used small cups to dry the cake pops after dipping them in white chocolate as shown in the pictures, rather than styrofoam which I unfortunately didn't have on hand.

These chocolate cake pops held together by nutella and coated in creamy white chocolate make it the perfect treat for virtually any occasion. I found this easy recipe from Divas Can Cook and you can find her recipe here. Now please excuse me as I go grab one from the fridge...


November 9, 2013

The Best Vanilla Cupcake


This rarely happens to me. You know, when you first taste test a cupcake and then fall in love at first bite. In fact, I'm convinced it's the best vanilla cupcake like, ever. And being myself, the ever experimental baker, I wanted to find another vanilla cupcake recipe that's fail proof with an authentic vanilla kick. So within my 2 years of baking, I've tested many vanilla cupcake recipes I dug out from the internet but this one from Cupcake Project's popular Vanilla Cupcake recipe is certainly crowned the best above the rest. It's got a super soft crumb that melts into your mouth with a true vanilla flavour that's hard to beat. I'm not exaggerating, its the truth. And I strongly suggest you try it, if you haven't already.


And what about the topping to match this perfectly baked vanilla cupcake? Ah yes, and since I am considerate for those who I bake for, I turned to my mother for the details:

Mum: "I want something with white chocolate"
Me: "Like a chocolate cupcake with chocolate frosting?"
Mum: "No....WHITE chocolate not the one from cocoa beans"
Me: "Okeydokey, the ultimate white chocolate cupcake it is...*runs off to get the white chocolate*

Actually, after the conversation I decided to change it to a vanilla cupcake with white chocolate frosting, as I figured it would be too much of one ingredient. With the white chocolate frosting, I landed into this recipe from Not So Humble Pie that A: involves cream cheese and B: has lots of white chocolate. Perfect. I am quite aware of the effects cream cheese has on piping, but I like that its tangy flavour cuts out some of the sweetness. Unfortunately it came out super sweet, I guess loads of white chocolate + icing sugar = SWEET HEAVENS. So, to solve the problem, I dabbed a little icing on the cupcake and was randomly hit with a brilliant idea of covering it with sprinkles. I mean, who doesn't like sprinkles? It screams fun and celebration when you look at it. It reminds me of the epicness that is fairy bread from my childhood really.


Since I was making this for two people, I slightly modified the recipe by halving the ingredients, and substituting yoghurt for sour cream. This turned out wonderful, so much so, my mother stood up, declared it one of the best cupcakes ever and rated it five stars (excluding the frosting). Oh, and before I leave for another cupcake, here's a little swirl of sweet white chocolate buttercream....


September 27, 2012

Baked Strawberry Cheesecake


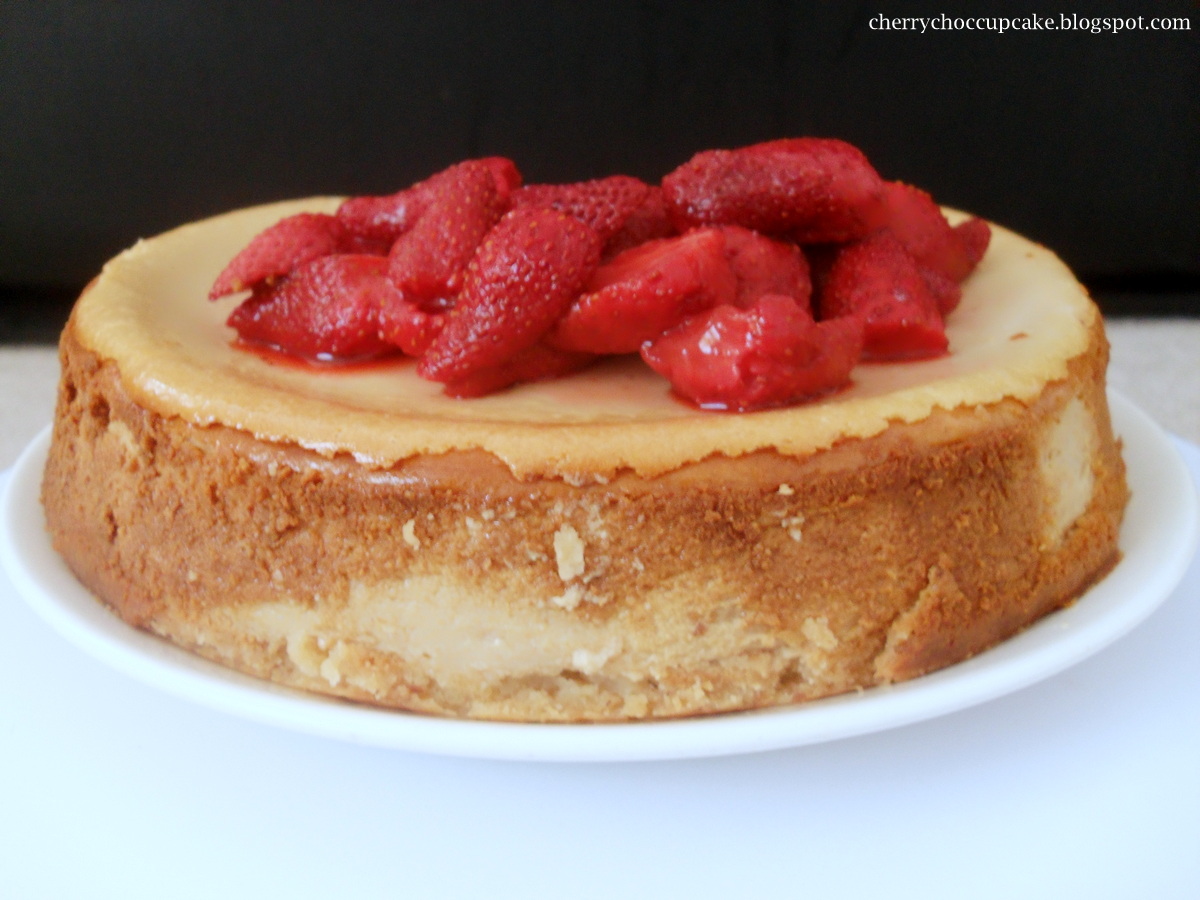
This is officially my favourite baked cheesecake. Think of luscious roasted strawberries with juices to die for, topped on a strawberry-flavoured cheesecake. It has ricotta in it, which makes it so light and fluffy compared to the only cream cheese ones. I actually first saw this on Raspberri Cupcakes, and I instantly wanted to make this particular one since I was craving for cheesecake recently. 


Strawberries are in abundance and are so cheap these days, which makes it perfect to use them for a cheesecake. I have never roasted fruits before, so I was a little skeptical of the idea of baking strawberries. But they came out so juicy and succulent, perfect for pairing with the cheesecake. Thanks to Steph (Raspberri Cupcakes), I will be roasting fruit more often now! You might have already seen it, but I tried to hide the ugly cracks on top of the cheesecake with the strawberries. This always happens to me whenever I bake a cheesecake.

 
I decided to use a recipe from Donna Hay for the biscuit base because I had run out of them and was too lazy to bake a batch. It came out fine, but probably next time I would use biscuits and process them up in a food processor for the base. It was just tasted a little bit more buttery to me...other than that, it was perfect, and next time I will definitely remember to buy more ricotta from the store for this cheesecake.


Baked Strawberry Cheesecake
Makes one 8 inch cheesecake

Adapted from Raspberri Cupcakes and Donna Hay.

Cheesecake filling
330 grams ricotta
500 grams cream cheese, softened
1 cup of strawberry jam
1 and 1/2 tablespoon of cornflour (cornstarch)
1 and 1/2 tablespoon of water
4 eggs

Base
1/3 cup of almond meal
3/4 cup of plain flour
1/4 cup of sugar
90 grams of butter, chopped

Strawberries
500 grams of fresh strawberries
3 tablespoons of brown sugar
2 tablespoons of apple cider vinegar

Method:

1. Preheat the oven to 150 degrees C (350 F). Make the base by combining almond meal, flour, sugar and butter in a food processor until a dough forms. Press the mixture with the back of a spoon on the base of a lined/greased 8 inch round springform pan. Bake for 15 minutes until light golden and set aside.

2. Make the filling by placing the cream cheese, ricotta, eggs and strawberry jam in the bowl of a food processor. Pulse until just combined. Combine the cornflour and water together in a small bowl and add to the cream cheese mixture. Process until smooth. Pour the filling over the biscuit base of the prepared cake tin and bake for 1 hour until golden and a little wobbly in the center. Turn the oven off and allow the cheesecake to cool in the oven for another hour. Transfer to a wired rack to completely cool.

3. Preheat the oven to 200 degrees C (390 F). To make the strawberries, hull and halve the berries and place them in a roasting pan. Add the brown sugar and toss to combine. Pour over the vinegar and toss again. Bake in the oven for 10-12 minutes until the berries soften and the juices are present. Allow to cool completely, then arrange on top of the cooled cheesecake before serving.


September 16, 2012

Neapolitan Layer Cake

 
So I was invited to a party last week. I was so excited about it that I planned what to make 3 days in advance. It only seemed fitting that a neapolitan cake would wow the guests and act as a thank you gift to the party host for inviting us. Distinctive layers of chocolate, vanilla and strawberry that is most familiar to me in my childhood (actually in ice cream form and yes, I was spoilt for the amount of ice cream I was allowed to have). Strangely enough, I remember only eating the chocolate part and leaving out the rest for my mum. But now, I love neapolitan ice cream in its whole form and eat every part of it (my favourite is still chocolate!).


I was only able to take photos of the cake before transferring it to the cake carrier so that's why the frosting-covered baking paper is still stuck to the cake (I use it to easily lift the cake onto the container). So I would like to apologise for the mess I had to capture, which honestly is quite embarrasing to me...but the main component in the pictures is the cake, right?


So would you like to see what's hidden in this cake? Here it is, the three neapolitan layers! I was surprised to see it look so similar to its ice cream form, and it seems that my hard work has paid off. I had some problems with the strawberry swiss meringue buttercream, but it came out all right at the end. I think it was due to the amount of strawberry puree and butter it had in it. The cake was also a little dense, but it was a real crowd pleaser and by the end of the day, there was none left...not even crumbs. I was so happy to see people enjoying the cake and commenting on how good it looked. Looks like I'll have to make this cake again soon, applying some changes to the recipe.


Since I followed the recipe from Annie's Eats and only made minor changes to the cake (I didn't add strawberry gelatin to the strawberry layer), I will direct you to her site which has all the detailed instructions and information you need to make this. Check it out HERE.


July 29, 2012

White Chocolate Cupcakes


Cupcakes are my thing at the moment. With my hectic study schedule and the upcoming exams looming in, all I could ever have time to bake was cupcakes and cookies. Plus my pretty paper eskimo baking cups recently arrived in the mail, patiently waiting in the cupboard for someone to use them. I am getting a little bored with baking only cupcakes this time (even though they all taste yummy), but soon enough I should be able to bake other things like cakes and macarons. I will, I promise.


These cupcakes are heavenly and are one of the best. The white chocolate heightens the flavours of the cupcake and adds a beautifully textured crumb. The cream cheese frosting complements the white chocolate perfectly and gives it a creamy tang to balance out the sweetness. Oh, and heart confettis add a little fun to the cupcakes. You can use whatever icing or topping you think is best to match the cupcake like white chocolate ganache. Traditional cream cheese icing is not normally served with white chocolate though, more often it is for banana, red velvet or carrot cakes. But since my mum requested this icing, I did it for her.


White chocolate cupcakes adapted from Ooh, Look.
Makes 12

Ingredients:

100 grams of butter, room temperature
2 eggs
1/2 cup of milk
1 teaspoon of baking powder
1 and 1/3 cups of plain flour, sifted
3/4 cup of sugar
100 grams of white chocolate, melted

Method:

1. Preheat the oven to 160 degrees C (320 F). Line a cupcake baking tin with 12 cupcake paper liners.

2. Beat butter and sugar using an electric mixer until light and fluffy. Add the eggs one at a time, until incorporated.

3. Add the sifted flour and baking powder into the butter mixture and mix until combined.

4. Mix in the milk and melted chocolate and continue to beat until smooth.

5. Fill the cupcake liners with batter until about 1/2 full and bake in the preheated oven for 20 minutes until a skewer inserted into the centre comes out clean. Remove the cupcakes from the tin immediately and cool completely on a wire rack.

Cream cheese frosting

Ingredients:

250 grams of cream cheese, softened and cut into cubes
50 grams of butter, at room temperature
1 teaspoon of vanilla extract
1/2 cup of icing sugar, sifted

Method:

1. Beat cream cheese and butter together with an electric mixer until light and creamy. Add the vanilla extract and beat until combined.

2. Gradually add the icing sugar to the cream cheese until well combined.

3. Beat the frosting again until it is fluffy and creamy and is ready to pipe.

Assemble the cupcakes by piping the cream cheese frosting on top. Sprinkle with your desired toppings and serve.


July 15, 2012

Vanilla Cupcakes with Caramel Buttercream


Hello! I've been absent for the past few weeks (again) but during that time, I was searching for a new mixer since my old one became useless for baking. I was thinking of getting a KitchenAid mixer, since so many bakers own one, but its expensive price put me off. So when I couldn't decide between the Sunbeam Planetary Mixmaster and the Breville Scraper Mixer Pro, I chose Breville because of the great reviews it had and the features which stood out to me. And can I tell you that was the best decision I have ever made! I am so happy and proud to be the owner of such an amazing mixer. It does all the work for me and makes baking a breeze. Now I have a second helper in the kitchen. So to celebrate the purchase of my new mixer, I made some vanilla cupcakes with caramel swiss meringue buttercream.


The picture above is of course, none other than my shiny new mixer! I am so in love with it and the sound of the motor is so quiet that I can concentrate on doing other things. It also has a count up or down timer which is handy to prevent overmixing and to indicate how long it has been mixing. It whips icing wonderfully, creams butter and sugar until light and fluffy in seconds, and mixes cake batter thoroughly. Oh and did I mention that it came with an ice cream bowl? Yep, it makes ice cream in just 10-20 minutes. I'm getting a little carried away here with my mixer, so let's talk cupcakes!


I had found The Ultimate Vanilla Cupcake bookmarked in my browser which I intended to try before but didn't have the chance to, so it was a great opportunity to try the recipe with my new mixer. It requires quite a few more ingredients than your average vanilla cupcake, but when mixed together, it produces vanilla-y, light and fluffy cupcakes that matches really well with the caramel buttercream. Talking about swiss meringue buttercream, adding caramel sauce to it transforms it from ordinary to something special with a rich caramel flavour that melts in your mouth. The unbelievably silky smooth, not too sweet texture makes swiss meringue buttercream among the best frostings to use for cakes and cupcakes.


The Ultimate Vanilla Cupcake adapted from the Cupcake Project.
Makes 16 cupcakes
Ingredients:
1 and 3/4 cups of cake flour (plain/all-purpose flour is fine)
1 cup of sugar
2 large eggs, at room temperature
1/2 teaspoon of salt
1 and 1/2 teaspoons of baking powder
1/2 teaspoon of baking soda
57 grams unsalted butter, at room temperature
1/3 cup of sour cream
1/4 cup vegetable oil
2/3 cup of milk
1 tablespoon of vanilla extract

Method:

1. Preheat the oven to 175 degrees C (350 degrees F). Prepare the cupcake pans with paper cupcake liners.

2. In a medium bowl or bowl of an electric mixer, mix together the flour, baking soda, baking powder, sugar and salt until well combined.

3. In a small bowl, whisk together the eggs, oil, sour cream and vanilla extract until combined and smooth.

4. Add the butter and mix on a medium-low speed for about three minutes. This will turn into a fine crumb texture.

5. Slowly add the egg mixture to the flour mixture, beating on a medium speed until just incorporated.

6. Slowly add the milk to the batter and mix on a low speed until just combined.

7. Fill the cupcake liners until just over half full. Bake in the oven for 14 minutes until a skewer inserted in the centre comes out clean. If they are not done, check them again in 2 minutes. They should be white in colour but not golden brown. Remove them from the pan immediately and allow to cool completely before decorating.


Caramel Swiss Meringue Buttercream adapted from Martha Stewart.
Ingredients:
4 large egg whites, at room temperature
1 cup plus 2 tablespoons of sugar
1/4 cup of heavy cream
1/4 cup of water
1 teaspoon of vanilla extract
180 grams of unsalted butter, chopped into pieces and softened at room temperature

Method:

1. Place 1/2 cup plus 2 tablespoons of sugar and the water in a medium saucepan and boil at a medium heat. Cook, swirling the pan ocasionally until it turns into a dark amber caramel. Wash the sides of the pan with a wet pastry brush to prevent the sugar crystals from forming. Remove from the heat, and whisk the cream into the caramel until smooth. Set aside to cool.

2. Place the egg whites and remaining sugar into a heatproof bowl over a pot of simmering water. Whisk the egg whites until the sugar has dissolved and the mixture is hot to touch. If you have a candy thermometer, it should reach 160 degrees when inserted into the mixture.

3. Remove from the heat, and transfer the mixture into the bowl of an electric mixer with the whisk attachment. Whisk on a medium speed for about 5 minutes. Increase the speed to medium high and whisk until glossy, stiff peaks form for about 5 minutes. Reduce the speed to medium, and add the pieces of butter one at a time, waiting for them to incorporate before adding the next piece. Whisk in the vanilla until combined. If the mixture is soupy, put it in the fridge for 15 minutes and whisk again. It will likely to come to the curdled stage, but keep whisking until it turns into a smooth buttercream. 

4. Switch to the paddle attachment. Mixing on a low speed, add the caramel slowly and beat until smooth, for about 3-5 minutes. Best used immediately.


Decorate the cooled cupcakes with the buttercream, using a 1M star tip. Top with sprinkles if desired.


Free Blog Template by June Lily